

So you’re a homeowner and planning a DIY metal roofing installation. As you might anticipate, the most difficult part of the job is installing the trim correctly. For this reason, you’re probably looking for the easiest method of installation.
Our staff at Western States Metal Roofing has you covered. Our team consists of employees who have experience selling and installing metal roofing and we are excited to take our 25 years of experience and share that knowledge, making your metal roof installation a breeze.
This week, we will cover how to install eave trim with a bullnose drip edge. This is an easier and faster installation than a standard eave trim because there are fewer parts to install.
This step by step installation article specifically covers eave trim installation for a Snap Lock clip system standing seam panel. This trim should only be installed if the pitch of your roof is 6” in 12” or less. It is not intended for installation of mechanically seamed standing seam or nail strip standing seam panels.
This blog will answer all of your installation questions with easy to follow instructions and pictures that illustrate each step. It’s intended to complement the installation video that will walk you through all of the steps.
Our goal in this article is to explain:
- Laying out your trim.
- Installing an optional fascia wrap.
- Installing trim cleat.
- Cutting and finishing eave trim at gable ends.
- Overlapping eave trim.
- Fastening eave trim.
What Is Eave Trim For Metal Roofing?
Eave trim is the first piece of trim that’s installed on a metal roof. It’s used when gutters are not required and finishes off the low sides of your home. It also directs water away from the side of your home.
Eave Trim vs. Drip Edge
You may sometimes hear eave trim referred to as “drip edge”, or even “eave flashing”. All of these terms refer to the same thing: trim that goes along the lower horizontal edge of a sloped roof.
Eave Trim Installation
For this installation, you will need the following parts:
- WS460 Fascia Trim (optional)
- Novaflex Silicone Sealant
How To Lay Out Eave Trim
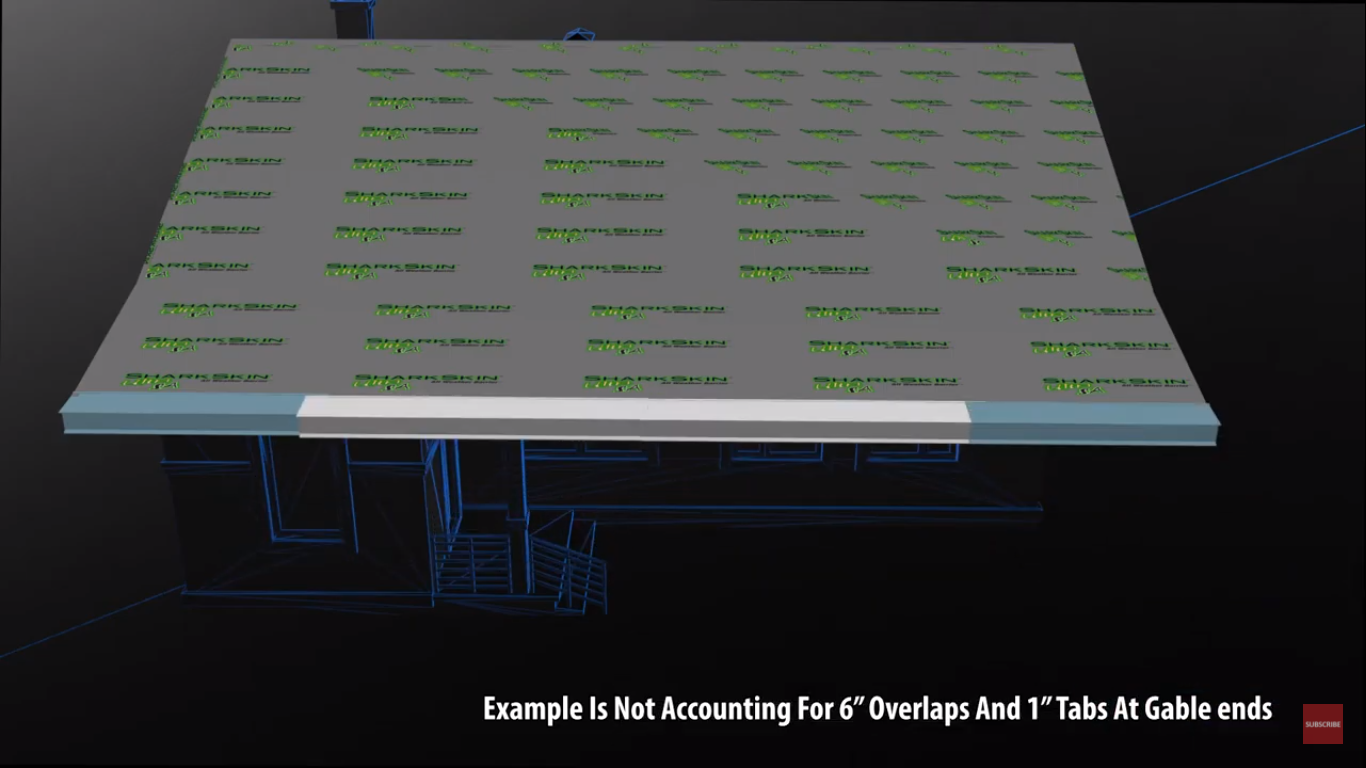
Prior to your layout, it’s good practice to plan the layout of your panel and trim.
For example, a standard length of eave trim is 10 feet. If your roof is 32 feet wide, you’ll end up with a two-foot piece of trim on one side.
A better layout will begin with a six-foot piece, then two standard 10-foot pieces, and end with a six-foot piece of trim. Symmetry in your layout will always lead to a better aesthetic for your roof.

When laying out your trim, you also need to account for six inches of overlap and one inch needed at your gable ends.
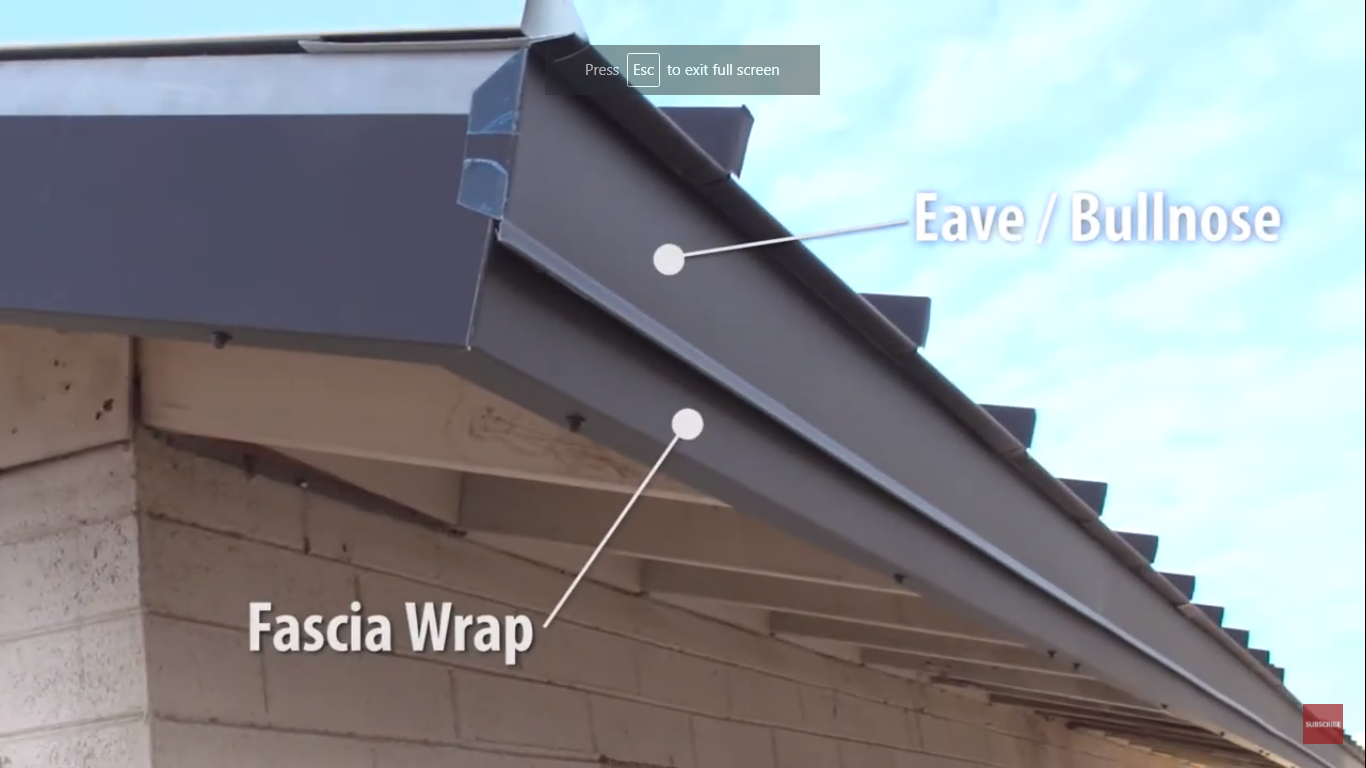
How To Install Fascia Wrap On A Metal Roof
Fascia wrap is an optional trim piece that covers and protects the exposed fascia and is installed before the trim cleat and eave trim.
To install this optional feature, simply:
- Measure the amount of trim needed at the gable end, and add one inch for a tab.
- Using metal cutting snips, trim the top section at your mark.
- At the bottom, mark the distance of trim needed and cut along the line.
- One inch from the lower edge, make a 45-degree cut back to the first mark.
- Cut a small notch at the edge of the trim.
- With a hand seamer, fold the tab downward 90 degrees. It should fold over toward the gable side of the roof.
- Fasten the lower section of fascia wrap with screws 12 inches on center.
- Overlaps should be a minimum of six inches.
- Place two beads of silicone sealant three inches from the edge of the trim.
How To Install Eave Trim
This plays a vital role in keeping your eave trim in place and is installed on the fascia or directly over the optional wrap.
- Place your eave trim on the roof, and outline the lower edge.
- Using this outline as a guide, align the lower edge of the trim cleat with the line.
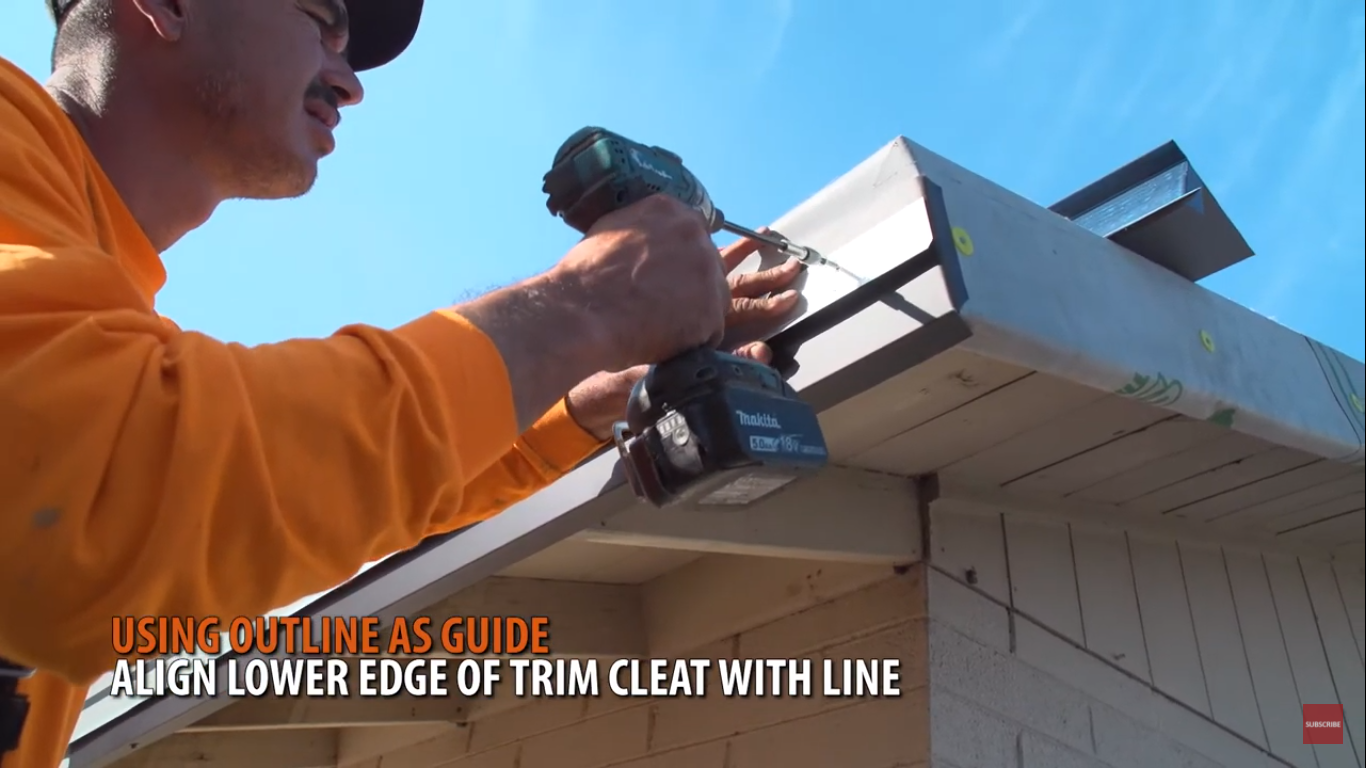
- Fasten the trim cleat with pancake screws 12 inches on center.
- Additional sections of trim cleat are simply butted end to end; no overlaps are needed.
How To Cut And Finish Eave Trim At Gable Ends
- Measure the distance of trim needed and add one inch for the tab.
- Mark a 45-degree line at the drip edge.
- Using metal cutting snips, cut along your outline.
- When cutting at the tab, cut the corners at a 45 degree.
- Mark a straight line on the top section for your trim.
- Continue cutting along your mark.
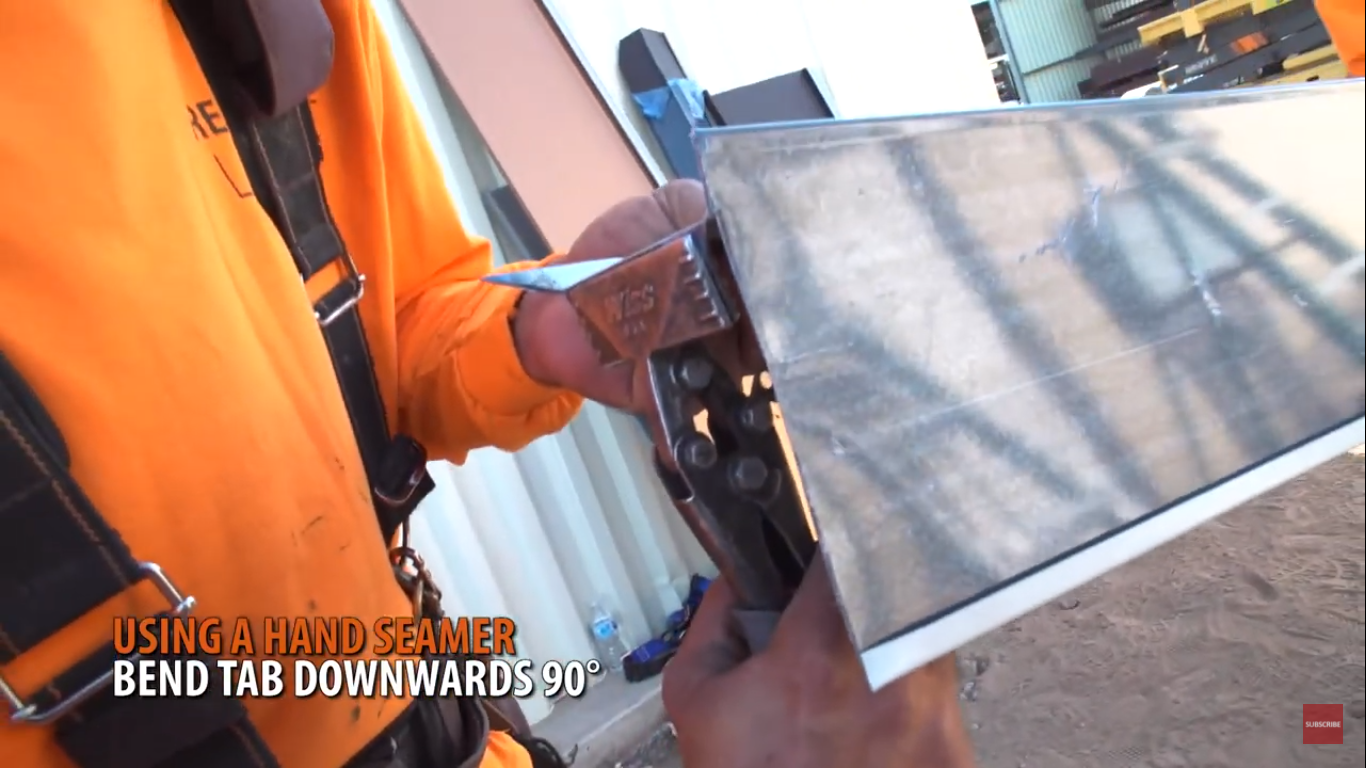
- Using a hand seamer, bend the tab downwards 90 degrees. The tab should fall flush with the gable side of your roof.
How To Overlap Eave Trim On Standing Seam Roof
NOTE: Overlaps should be six inches.
- Mark six inches onto your trim.
- Cut up to the mark at the fold of the trim.
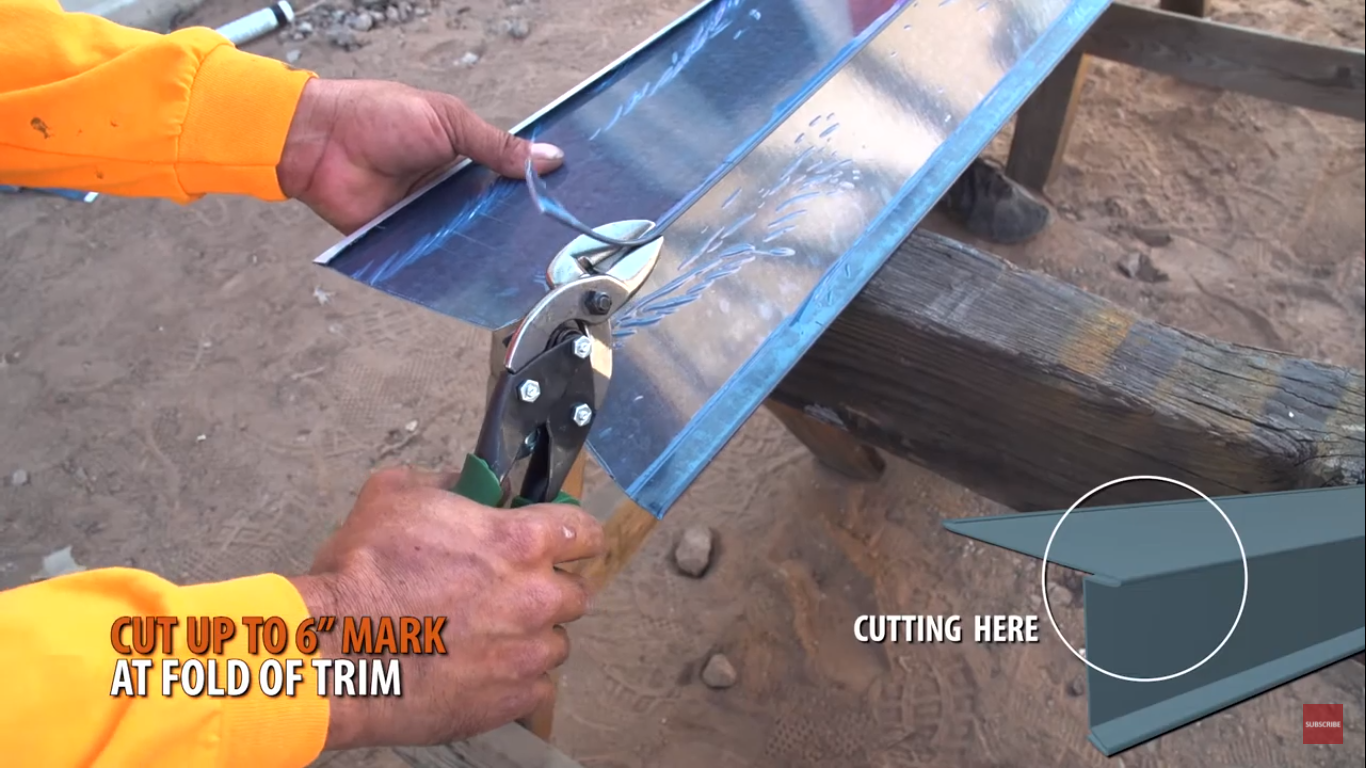
- At the drip edge, cut the six-inch mark at the hem of the trim.
- On the adjacent piece, notch cut the hem up to the six-inch mark.
- Silicone sealant should be applied three inches from the edge.
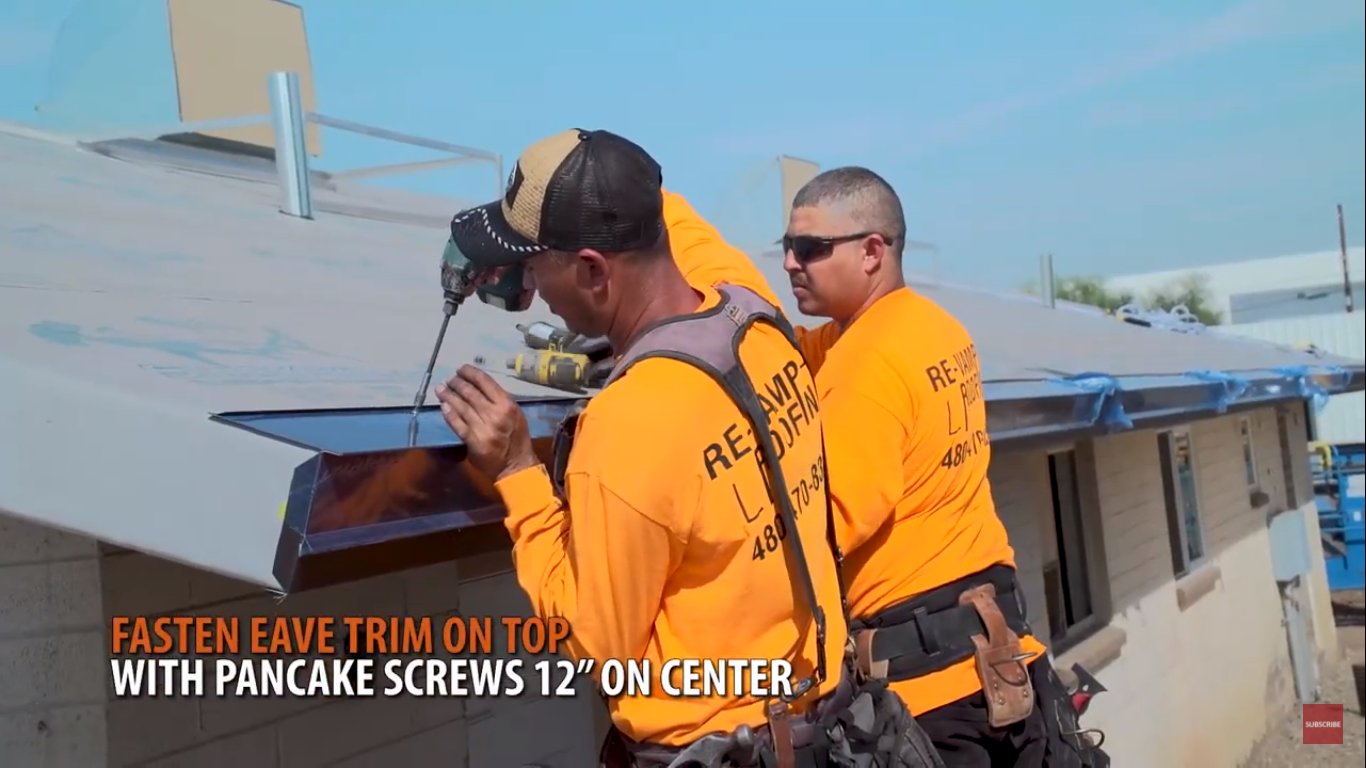
How To Fasten Eave Trim
- First, hook the lower section on the trim cleat.
- Fasten using pancake screws 12 inches on center.
3. Remove protective plastic coverings upon installation.
Need More Help With Standing Seam Metal Roofing Installation?
For panels and accessories needed for your standing seam installation, go to the Western States Metal Roofing website to see our catalog, and request a quote or metal color sample as there are hundreds of colors to choose from.
Looking for more homeowner guides and step-by-step installation help? Be sure to subscribe to our Youtube channel as we release new installation videos weekly. You can also find everything you need at the Western States Metal Roofing Learning Center to help you have an easy and successful installation.


